Guides / Create an Event

Create an Event

The event creation wizard walks organizers through the minimum setup required to launch a new event. It collects your event details, RSVP preferences, point-of-contact information, and plus-one settings before you create the event.

Get a new event live quickly with the minimum setup needed to start inviting guests.

When to use it

  • You are starting a brand-new event from the dashboard.
  • You want to set RSVP rules before adding guests.
  • You need to define the event contact guests should reach out to.
  • You want to decide whether guests can bring plus-ones during the initial setup.
1

From the dashboard, click Create Event.

The event creation wizard opens and starts on Basic Information.

Create an Event step 1
2

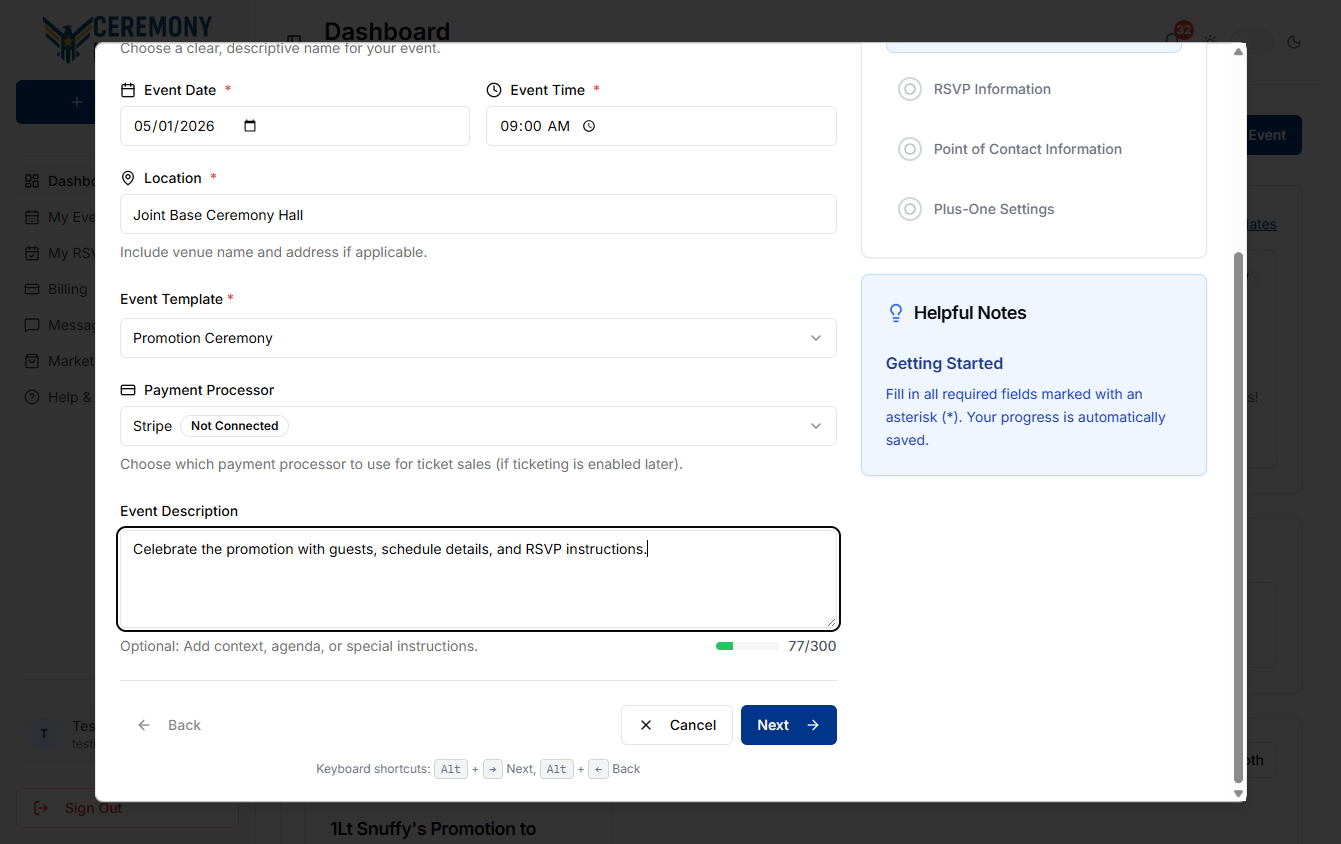
Fill out the Basic Information step with your event name, date, location, template, and description.

Basic Information is where you define the event details guests will see first.
Create an Event step 2
3

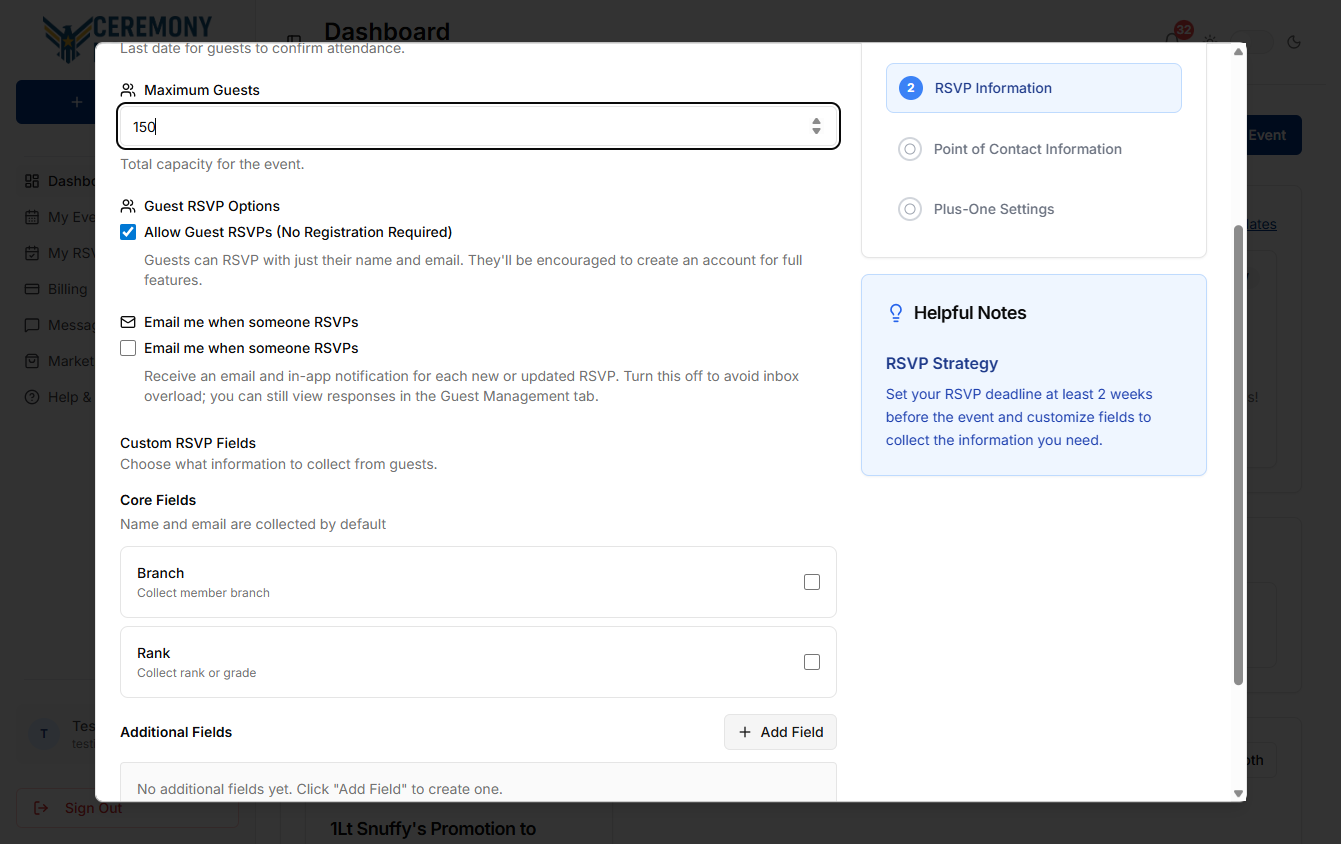
Continue to RSVP Information to set the deadline, capacity, guest RSVP options, and extra fields.

RSVP Information controls how responses are collected and what guest details you want to capture.
Create an Event step 3
4

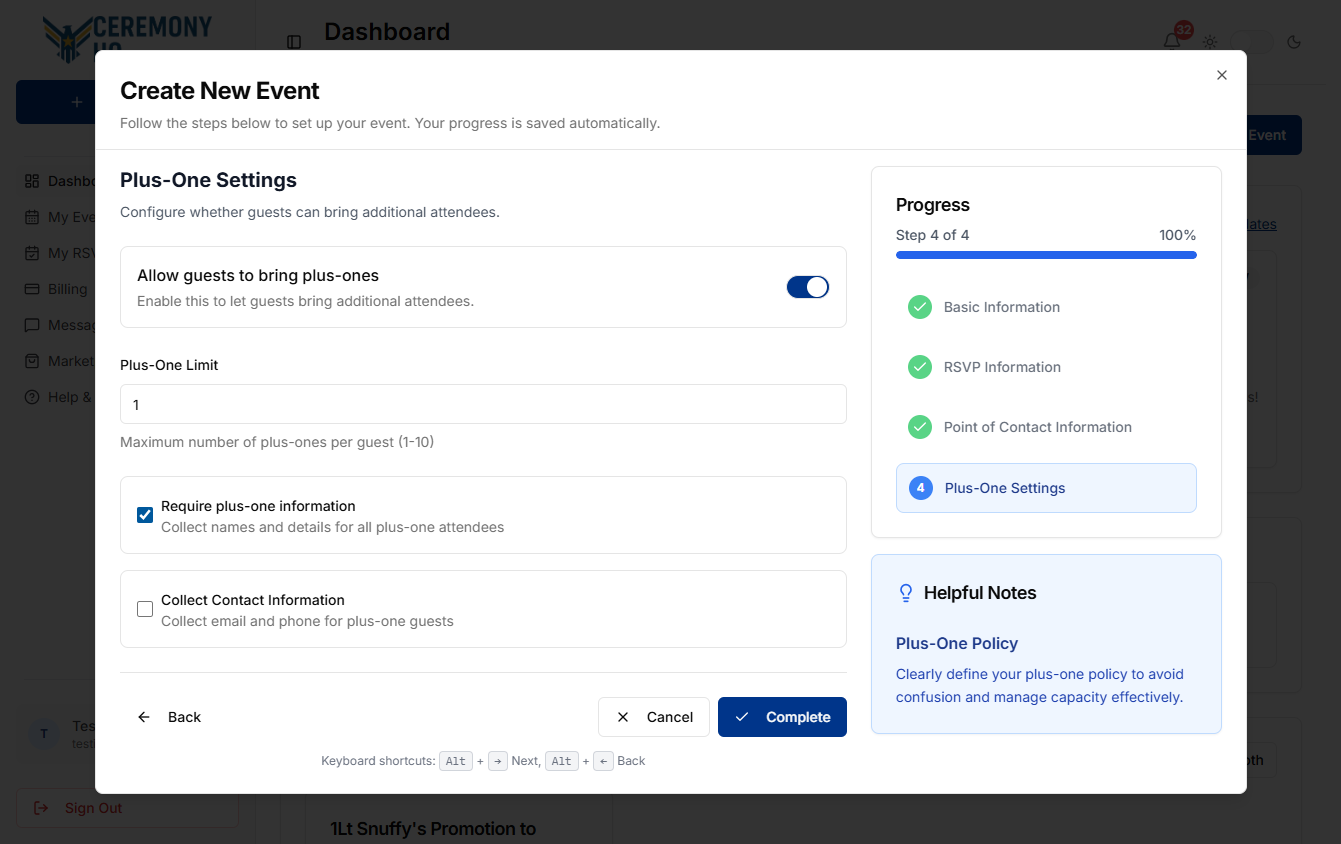
Move through Point of Contact Information and Plus-One Settings to finish the setup.

The final steps let you choose who guests can contact and whether they can bring additional attendees before you create the event.
Create an Event step 4

Tips & gotchas

  • Pick the event template early because it shapes the starting experience for the invitation.
  • If you plan to collect extra guest details, add those fields in the RSVP Information step before inviting anyone.
  • Use a shared point-of-contact email if more than one organizer monitors guest questions.
  • You can leave plus-ones off for now and adjust those rules later from Event Management if needed.